THE PHOTO NOTEBOOK
How to make a photo look vintage
WarmFilmLab applies a vintage finish to an existing photo: choose a film preset, adjust grain and fading, then download a PNG. Editing happens in your browser. It does not generate a new face, outfit or scene.
Open the film studioOne photo, three film finishes
Compare the original with actual PNG exports from this editor. The source is our fictional, AI-generated demo portrait. The filters change existing pixels; these finished examples were not generated by an image model.
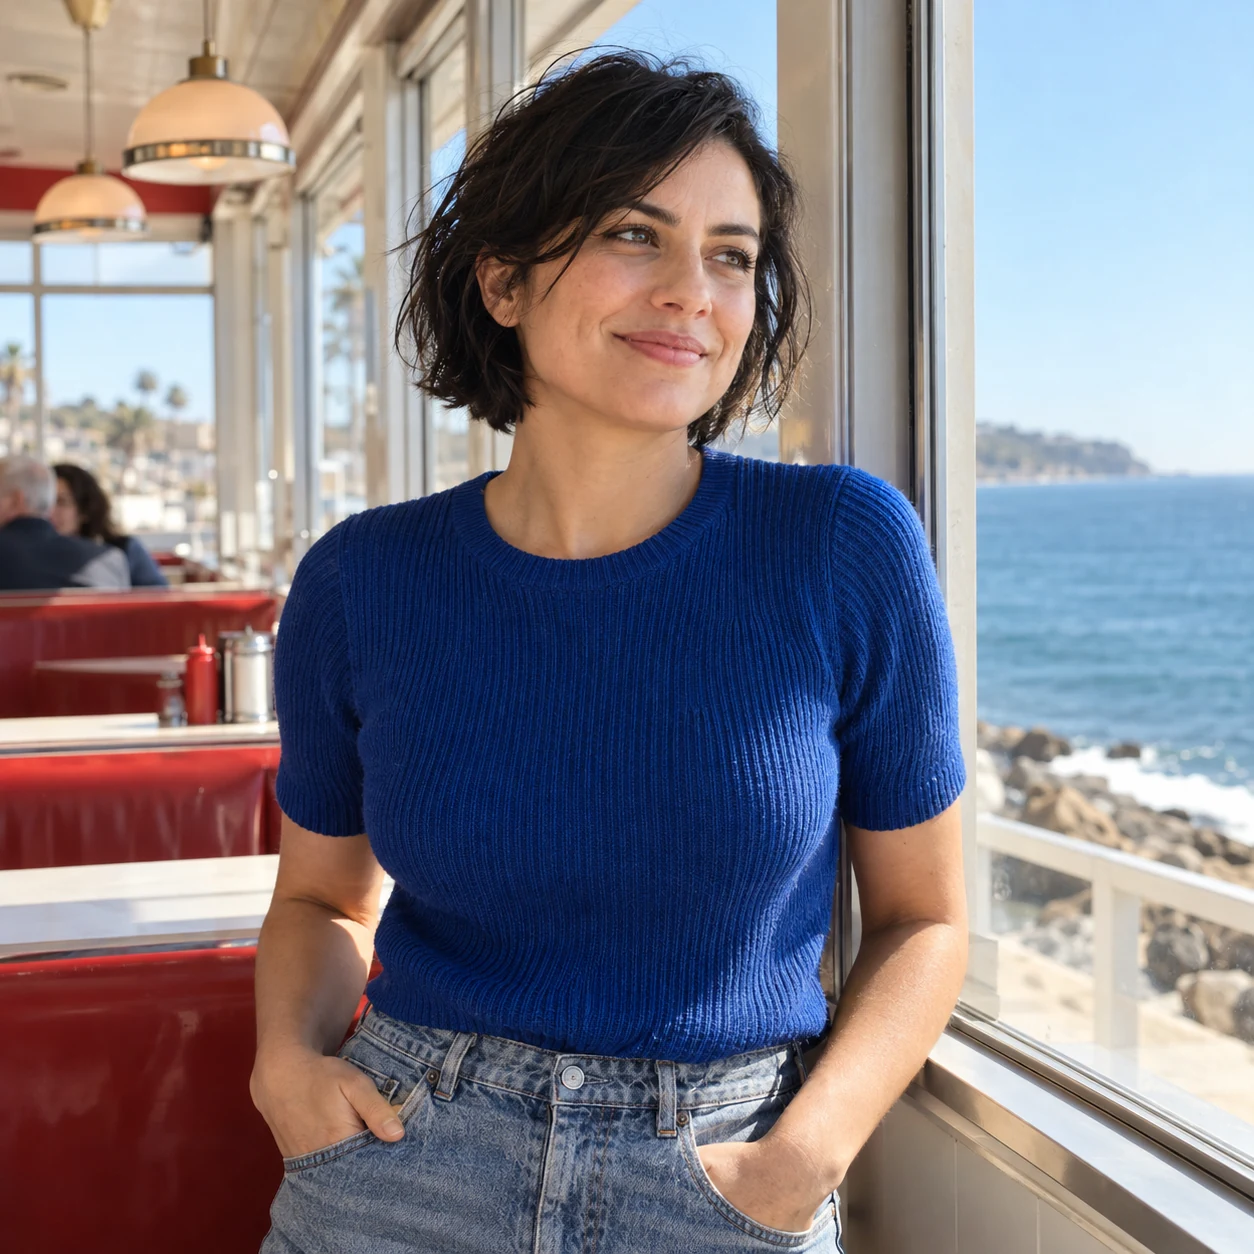
Original
Unfiltered demo. All four images use the same crop.
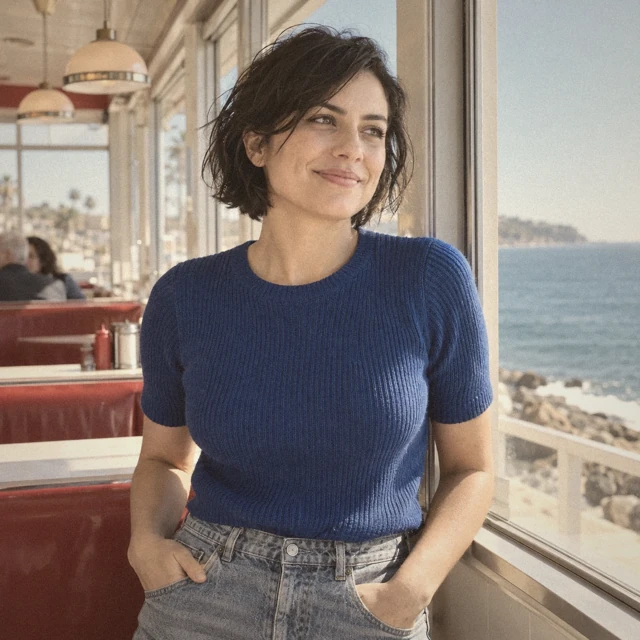
Summer ’86
Grain 24 · Fading 18. Warm tint with gentle fading.
Try these settings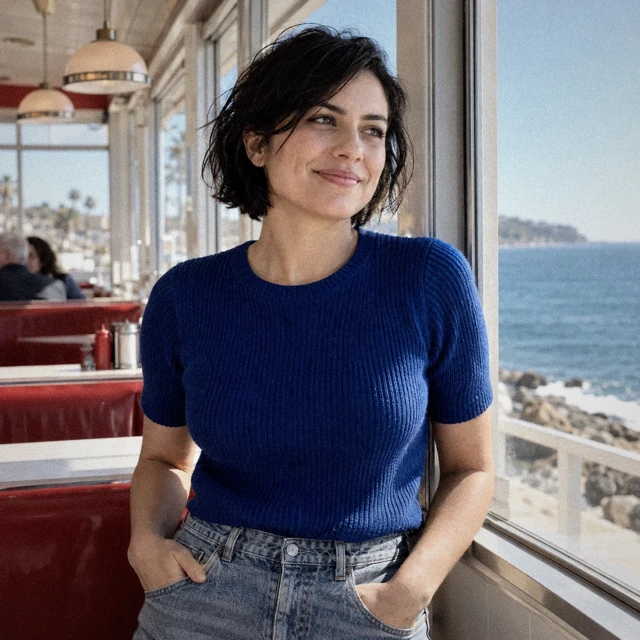
After hours
Grain 32 · Fading 7. Cooler tones with stronger contrast.
Try these settings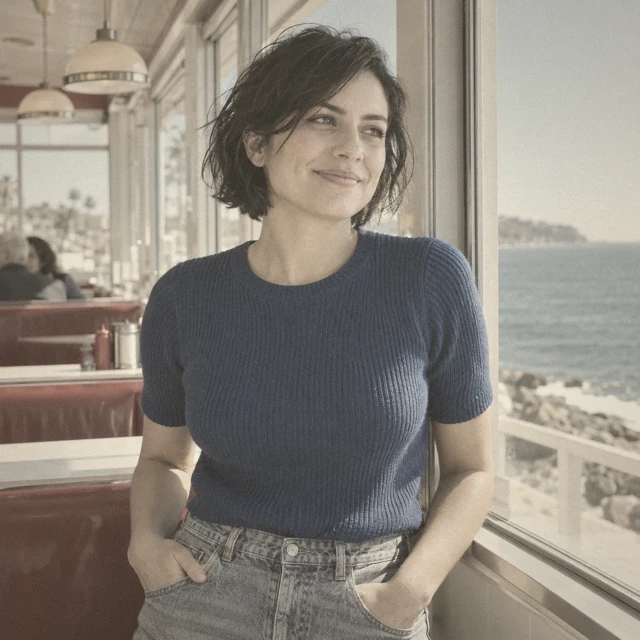
Family album
Grain 19 · Fading 32. Muted color and softer contrast.
Try these settingsCaptured 10 October 2026. Original ratio, print border off and date stamp off; each editor export is 1254 × 1254 px. These web images are compressed for reading. Use the editor’s PNG download to inspect your own result.
Reproduce the Summer ’86 example
- Open the settings link below the example. The editor loads its demo with Summer ’86 and no border.
- Check Film grain = 24, Fading = 18, Crop = Original ratio, and Date stamp off.
- Use View original to compare. Return to View edited and download the PNG.
- Choose your own photo when ready; the settings stay available for your local edit.
Apply a vintage filter in four steps
- Choose your photo. Open the film studio and select a JPG, PNG or WebP. Use a file up to 15 MB. The demo is useful for trying controls; choose your own photo before exporting a personal result.
- Pick a finish. Summer ’86 starts with a warm, sun-faded look. After hours uses a cooler, higher-contrast palette. Family album gives a softer, muted finish. These are creative presets, not reproductions of a particular film stock.
- Adjust the details. Change Film grain and Fading, choose Original ratio, Square or Portrait 4:5, and switch the print border or date stamp on or off. For Square or Portrait 4:5, use the position slider to keep your subject in the frame. Depending on your photo’s shape, move horizontally or vertically; Original ratio keeps the whole photo.
- Compare and download. View original compares the unfiltered image using your current crop and border. View edited brings the finish back. Check the PNG dimensions shown below the download button, then choose Download PNG.
Which preset should I start with?
| Preset | Color and contrast | Try it when you want |
|---|---|---|
| Summer ’86 | Warm, gently faded | A relaxed print-like finish |
| After hours | Cool, higher contrast | A punchier evening snapshot |
| Family album | Soft, muted | A quieter, aged-album feel |
Use the same photo to compare presets. A dark photo and a bright photo can respond differently to the same settings. If faces look washed out, lower Fading before adding more grain.
What size and format will I get?
WarmFilmLab exports PNG. The working photo is resized to a maximum 1600-pixel edge before cropping; the selected border adds pixels around that working image. The dimension label shows the actual export size. This is not a full-resolution or upscaling tool.
HEIC, GIF, RAW and video files are not supported by the editor. Photos over 80 megapixels are rejected, even if the file is under 15 MB. Convert unsupported files to JPG, PNG or WebP first. The original source file is not overwritten.
Are my photos uploaded?
Selected photos are processed in browser memory. WarmFilmLab does not upload them or persist them in browser storage. Reloading clears the selected photo. The website still makes ordinary requests for its page, demo image and fonts; those requests do not contain your selected photo.
The filters and PNG export are free, require no editor account and add no watermark. Image generation in an external service, if you use a prompt there, follows that service’s pricing and privacy policy.